Historical Trend Reporting in Salesforce is used to capture historical data of Opportunity and upto 3 custom objects for the last 3 months.
Follow the below steps to setup Historical Trend Reporting in Salesforce
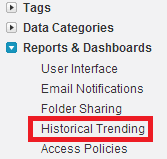
1. Go to Setup –> Customize –> Reports and Dashboards –> Historical Trending.

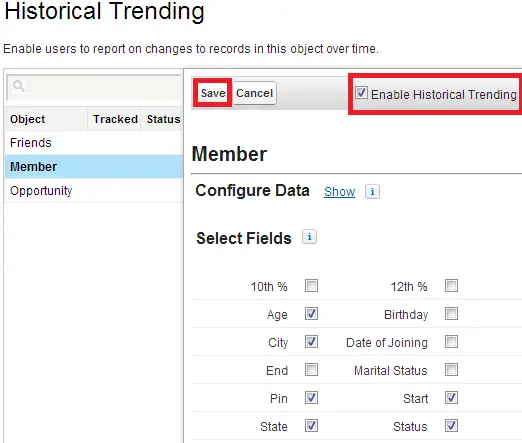
2. Select the object, check Enable Historical Trending check box. Click “Show” link in Configure Data to select the filter condition for Historical Trending.

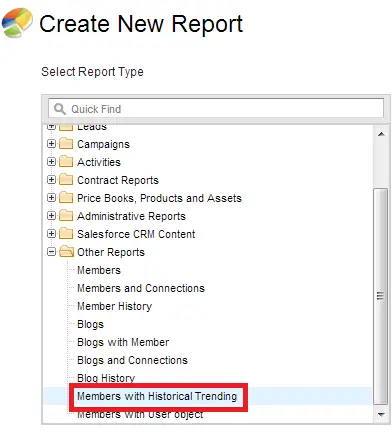
3. Create a report report with the Historical trending report type.

4. Historical date will shows the values on that particular date in the report.

Limitations on Historical Trend Reporting
- You can make up to three months of data available for historical trend reporting.
- Up to 5 million rows of historical trending data can be stored for each object. Historical data capture stops when the limit is exceeded. The admin is alerted by email when any object reaches 70 percent of the limit, and again if the limit is exceeded.
- Each historical trend report can contain up to 100 fields. In Opportunities reports, this includes the standard preselected fields, which can’t be disabled.
- You can specify up to five historical snapshot dates in each historical trend report.
- You can use up to four historical filters on each historical trend report.
- These field types are supported: Number, Currency, Date, Picklist.
- Internet Explorer 6 is not supported.
- The Report Wizard is not supported. Historical trend reports can only be created with the Report Builder.
- When you turn off historical trending for a field, that field’s historical data is deleted.
- When you turn off historical trending for an object, all historical data and configuration settings are deleted for that object, including the object’s historical trending report type and any reports that have been created with it.
- When you turn off historical trending for a field, and then delete that field, the field’s historical data will not be available if historical trending is enabled again.