1. Create a Custom Field in Chat Transcript object.
2. Create the same Custom Field in Contact object.

3. Add the Custom field from Contact to the Embedded Service Chat Deployment.
For your Website:
embedded_svc.settings.extraPrechatFormDetails = [ {
	"label": "Skill",
	"transcriptFields":[ "Skill__c" ],
	"displayToAgent": true
} ];
For Community or Experience Cloud:
1. Create a Static Resource(JavaScript File).
window._snapinsSnippetSettingsFile = ( function() {

    console.log( "Static Resource file loaded" );

    embedded_svc.snippetSettingsFile.extraPrechatFormDetails = [ {
        "label": "Skill",
        "transcriptFields":[ "Skill__c" ],
        "displayToAgent": true
    } ];

})();
2. Note the Static Resource Name.
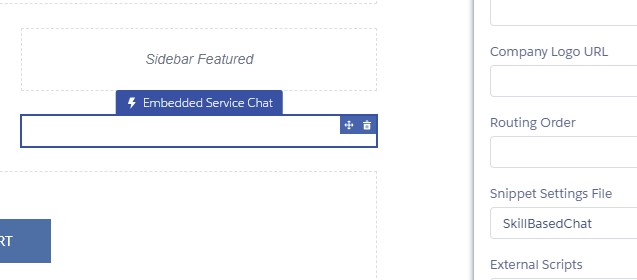
3. Configure it in the Experience Builder. Use “Snippet Settings File”.
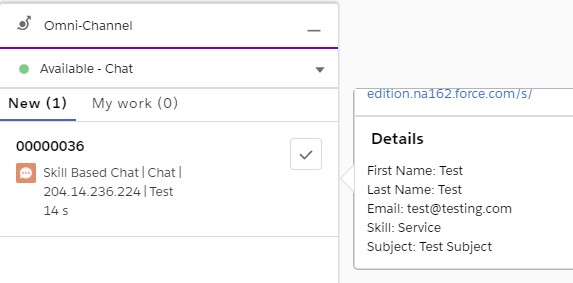
Output: