
To build Salesforce Orchestration, check the following:
Sample Flow Orchestrator:
Scenario:
When an Account record is created.
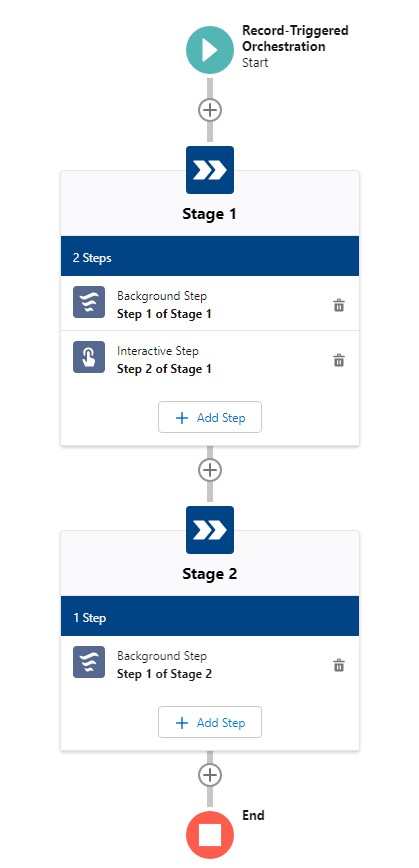
Stage 1:
1. Update the Case Description to Stage 1.
2. Wait for the Screen Flow to complete.
Stage 2:
1. Update the Case Description to Stage 2.
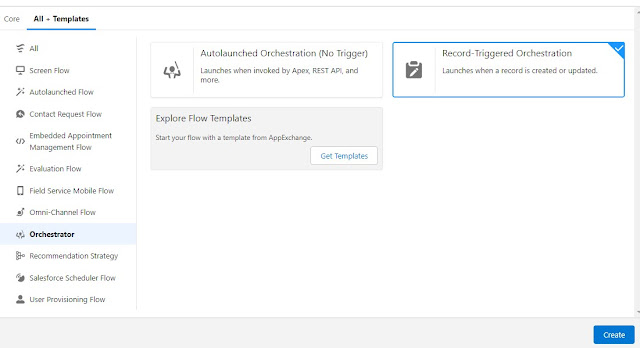
To create Salesforce Flow Orchestrator, follow the below steps.
1. Go to Flows in Setup.
2. Click New button.
3. Select All + Templates tab.
Sample Flow Orchestration
Step 1 of Stage 1:

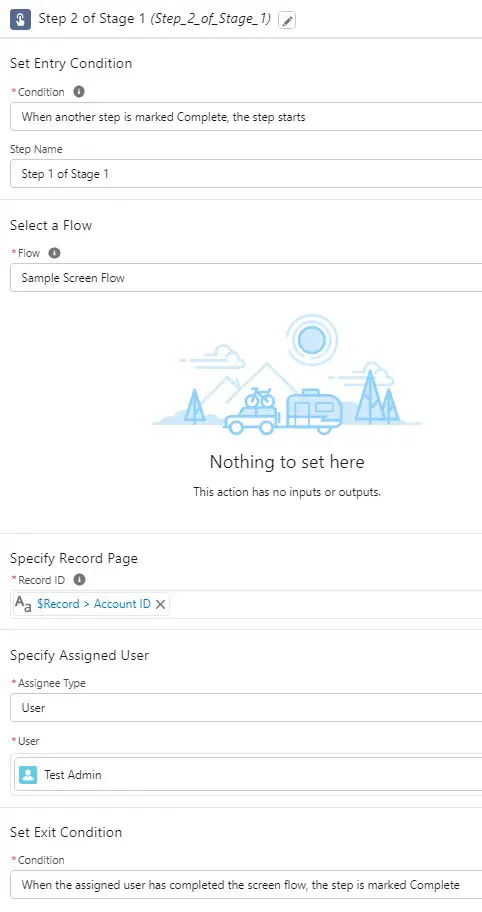
Step 2 of Stage 1:
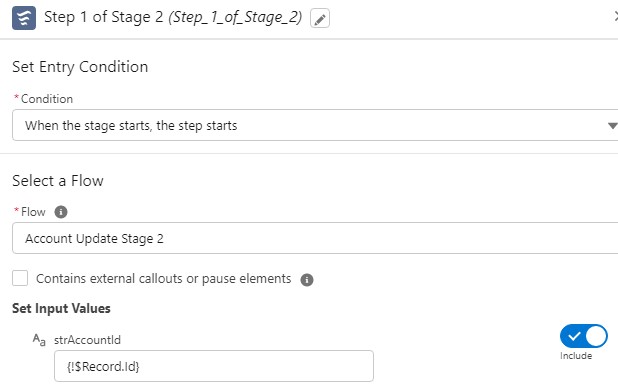
Step 1 of Stage 2:
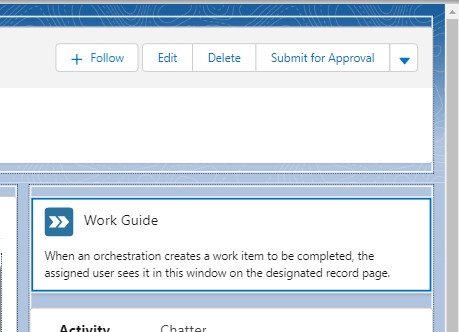
Add the Orchestrator Work Guide to the Lightning Record Page
Output:
When the account record is created, it will update the Description to Stage 1, sends an email for the interactive step 2 to complete and the Screen Flow will be available in the Work Guide to Complete.

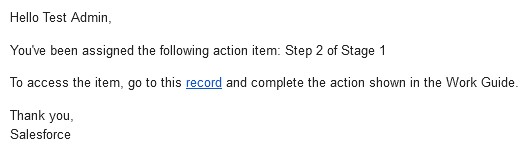
Sample Email Notification for the Interactive Step:
Video Reference: