
1. Install the Amazon CTI Package.
https://appexchange.salesforce.com/appxListingDetail?listingId=a0N3A00000EJH4yUAH
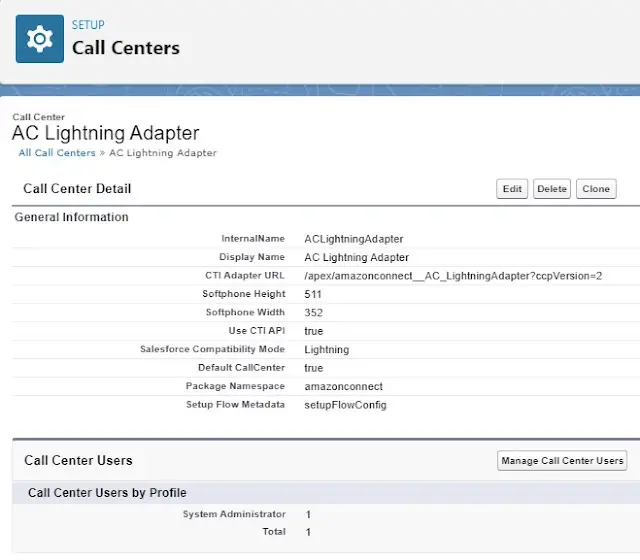
2. Go to Call Centers in Setup. Select “Amazon Connect Lightning Adapter”. Click Manage Call Center Users and assign yourself.
3. Go to App Manager. Edit the App. Add “Open CTI Softphone” to it.

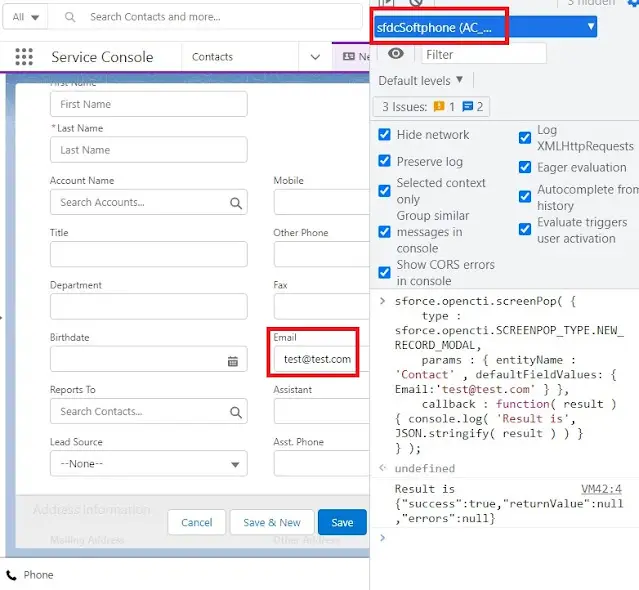
4. Open the App. Use Browser Developer tool. Select sfdcSoftPhone. Run the following JS.
To show Create Contact screen with Email defined:
sforce.opencti.screenPop( {
    type : sforce.opencti.SCREENPOP_TYPE.NEW_RECORD_MODAL,
    params : { entityName : 'Contact' , defaultFieldValues: { Email:'[email protected]' } },
    callback : function( result ) { console.log( 'Result is', JSON.stringify( result ) ) }
} );
To create Contact record and show:
sforce.opencti.saveLog( {
    value:{ entityApiName : "Contact", FirstName : "Testing", LastName : "Testing" },
    callback: function( result ) {
        console.log( 'Result is', JSON.stringify( result ) );
        console.log( 'Record Id is', result.returnValue.recordId );
        sforce.opencti.screenPop( {
            type : sforce.opencti.SCREENPOP_TYPE.SOBJECT,
            params : { recordId : result.returnValue.recordId },
            callback : function( result ) { console.log( 'Result is ' + JSON.stringify( result ) ) }
        } );
    }
} );
To search and show records:
sforce.opencti.searchAndScreenPop( {
    searchParams : 'testing' ,
    queryParams : '',
    callType : 'inbound',
    deferred : false,
    callback : function( result ) {
		console.log(
			'Result is',
			JSON.stringify( result )
		) ;
	}
} );
Video Reference: