System for Cross-Domain Identity Management (SCIM) REST API in Salesforce can be used to assign multiple Permission Sets to an user.
1. Create a Connected App in Salesforce.
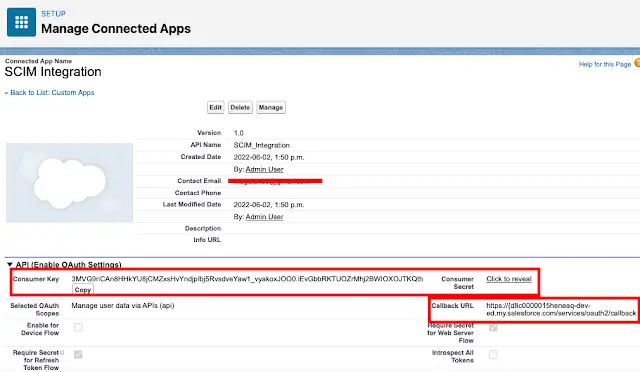
Connected App Callback URL: https://d8c0000015heneaq-dev-ed.my.salesforce.com/services/oauth2/callback
Here, d8c0000015heneaq-dev-ed is my Salesforce Domain.
2. Note down the Consumer Key and Consumer Secret from the Connected App.
3. Get Salesforce Access Token.
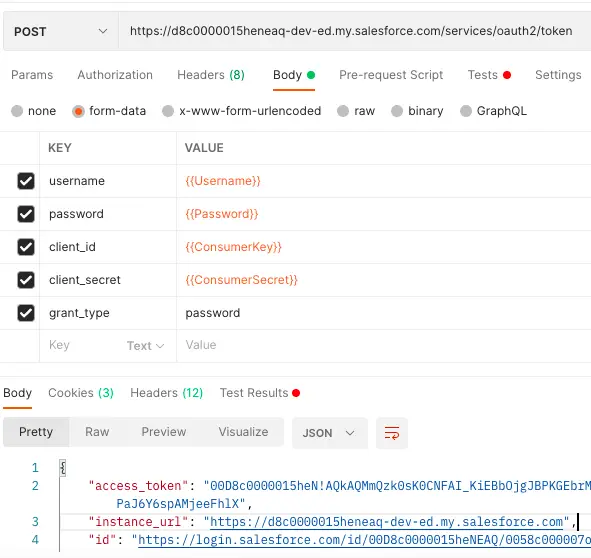
Endpoint: https://d8c0000015heneaq-dev-ed.my.salesforce.com/services/oauth2/token
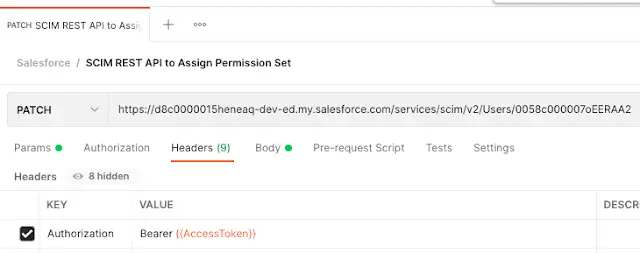
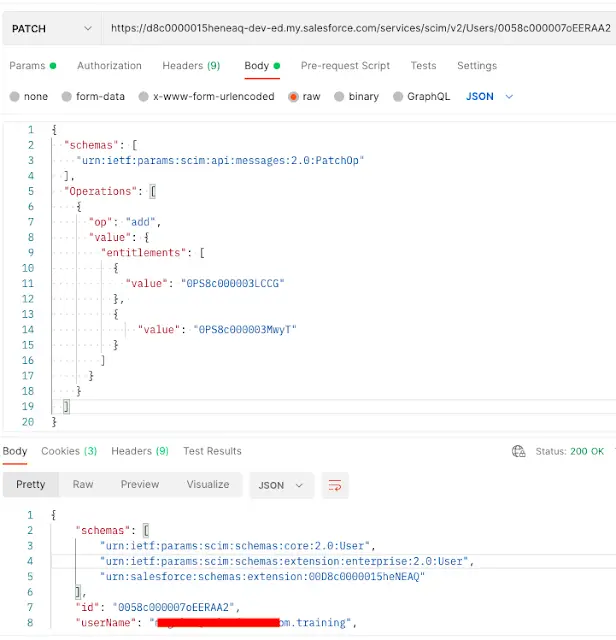
4. Using the access token from step 3, make a call to SCIM REST AP.
Endpoint:https://d8c0000015heneaq-dev-ed.my.salesforce.com/services/scim/v2/Users/0058c000007oEERAA2
Headers:
Body:
{
  "schemas": [
    "urn:ietf:params:scim:api:messages:2.0:PatchOp"
  ],
  "Operations": [
    {
      "op": "add",
      "value": {
        "entitlements": [
          {
            "value": "0PS8c000003LCCG"
          },
          {
              "value": "0PS8c000003MwyT"
          }
        ]
      }
    }
  ]
}
Video Reference: