In the Omni-Channel Flow, we have to route the Messaging Session to Agentforce Service Agent to invoke Agentforce for the Salesforce Messaging for In-App and Web.
1. Setup Salesforce Messaging for In-App and Web.
2. Create an Agent. Use “Agentforce Service Agent” as the type.
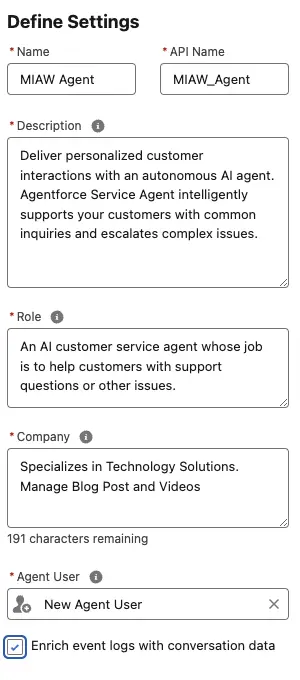
Sample Company “Specializes in Technology Solutions. Manage Blog Posts and Videos.”.
Sample Role “An AI customer service agent whose job is to help customers with support questions or other issues.”.
You can use an existing user for Agent User selection instead of New Agent User.
3. Create a Omni-Channel Flow to route the Messaging Sessions to the Agentforce.
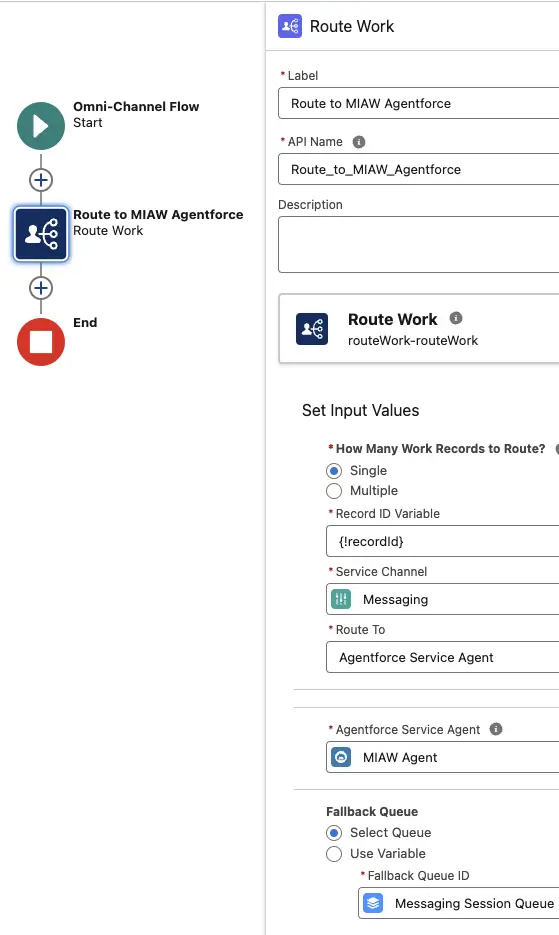
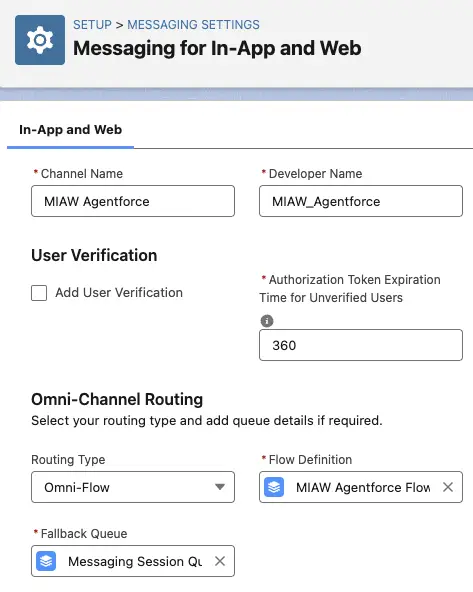
4. Go to Messaging Settings in Salesforce Setup and edit the Messaging Channel. Use the Routing Type as Omni-Flow and Flow created in Step 3 for Flow Definition.
5. Activate the Agent. Publish the Embedded Service Deployment.
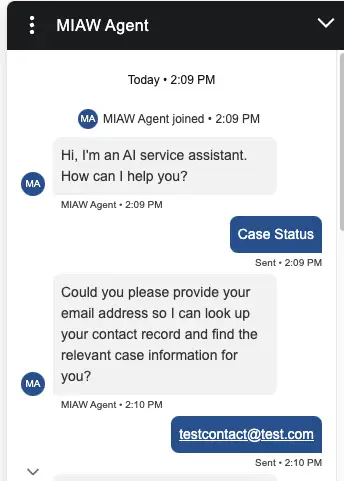
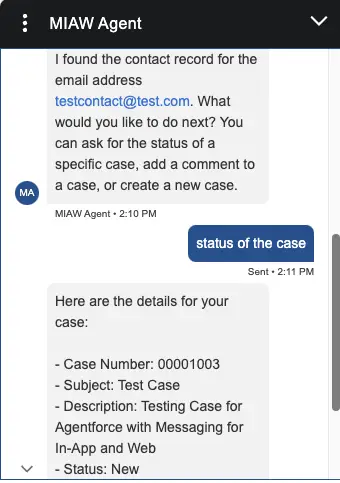
Output: